
Question:
How do I draw a semicircle?
Answer:
There are a few options but probably the easiest way is to use the arc defined by centre and two end points tool.

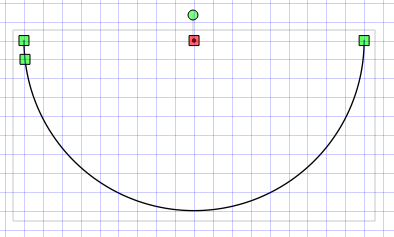
Start at the centre. Click and release on the centre. Move to one end of the semi circle (easiest if you use the same grid line) and click.

Now move the mouse to the grid point on the other side and click. If you move up when you start moving, your semicircle will be the top one. If you move down, it will be the bottom one.


If you got the “wrong” semi-circle, select the arc and grab the control point shown above. This points which of the two arcs defined by the end points is drawn. If you move it to the other side, you will get the other semicircle.
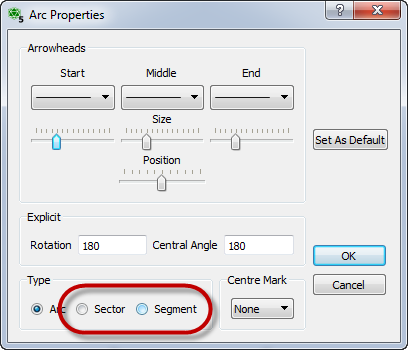
If you want to close the semi-circle (so you can shade it for example) you can right click on the semicircle and edit properties. Change it to a sector or segment (it doesn’t matter which one for a semicircle).

You can use the rotate handle to rotate the semicircle to your desired orientation.
Discover more from Efofex News
Subscribe to get the latest posts sent to your email.
